Organic Whole Foods Made with Integrity
Wholesome Chef Mici
  • Home
  • About Mici
  • Services
  • Recipe Blog
  • Photos
    • Paleo Pix
    • Macro/Desserts Pix
  • Videos
  • Gluten?
  • Paleo?
  • Like Minded
  • Testimonials
  • Contact

Grain-free Pancakes

12/25/2013

0 Comments

 
Picture
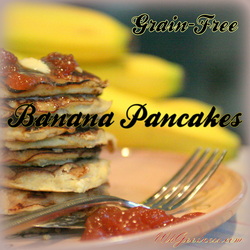
"I've heard of Gluten-Free, but Grain-Free? How do you... What the...?"

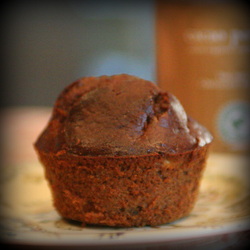
I went off all grains in the summer of 2013 and it really has made a big difference in my health. Particularly in my auto-immune symptoms. But grain-free doesn't have to be pleasure free. I'll attempt to prove that here with one of my favorite breakfasts... PANCAKES! (I mean cake is in the name for heaven's sake!)

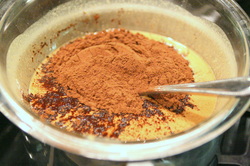
3 tbs. Coconut flour
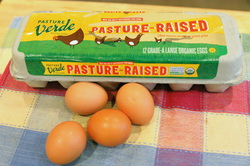
2 Pasture Eggs
1/2 tsp. Baking Powder
1/2 tsp. Vanilla
3-5 tbs. Coconut water, almond milk, or water...
Coconut oil for frying

Fresh Fruit or 100% Fruit Jam
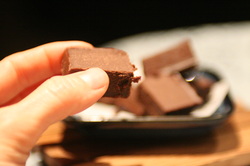
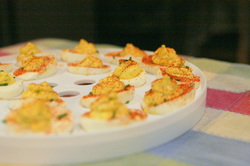
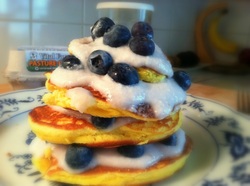
Would you like the Coconut Cream topping in the picture above?  click here

Picture
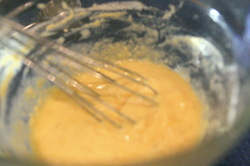
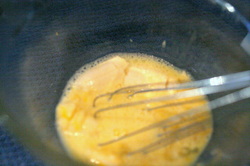
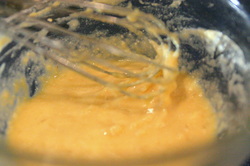
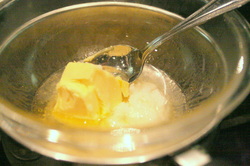
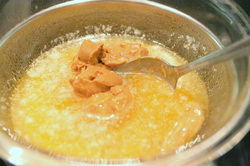
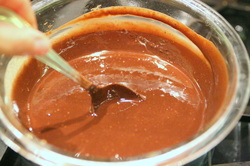
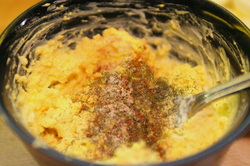
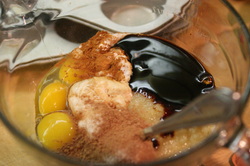
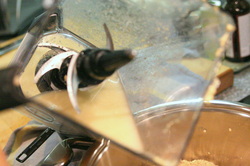
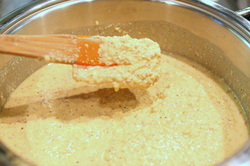
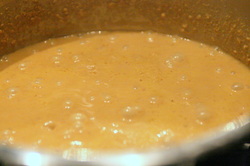
Mix all your wet ingredients first. Then your dry.

Picture
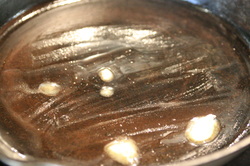
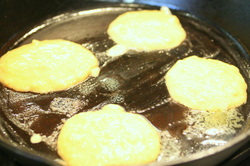
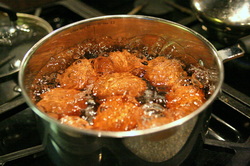
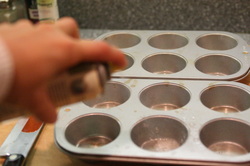
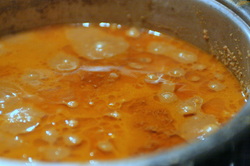
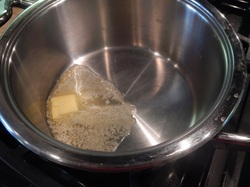
Bring your skillet up to heat with your butter or coconut oil. Coconut oil is more stable at high temperatures. You can always melt butter over the top when done, for that familiar taste.

Picture
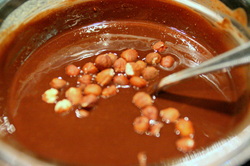
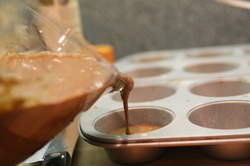
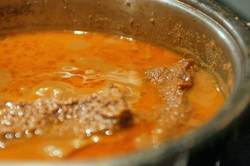
Pour 1/4 of a cup or so of the batter and wait for little bubbles to form. Then flip and cook on the other side.

Picture
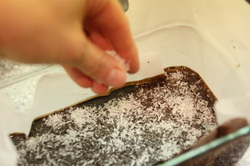
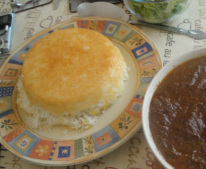
Top with coconut cream and fruit for a very satisfying breakfast. All the protein and good fats in this dish holds me very well till a late lunch.

Picture
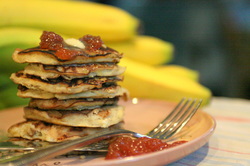
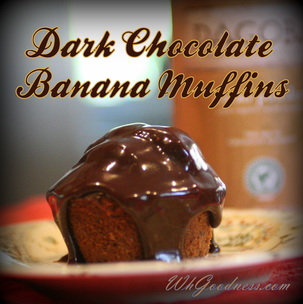
Want Banana pancakes instead? this is a great recipe, too.

0 Comments

Grain Free Banana Pancakes

12/25/2013

0 Comments

 
Picture
So many way to make such a wonderful treat. I keep them around in the fridge as mid afternoon snacks sometimes as well as for breakfast. They are gently and naturally sweet, and full of protein, making them perfect to hold you till your next meal. These ones are super moist.


2 pasture raised Eggs
1/4 cup Liquid (coconut water, nut milk, water...)
1/4 tsp. Vanilla
1 Banana -very ripe
1-3 drops Stevia
1/2 tsp. Baking Powder
1 pinch Sea Salt

1/4 cup Coconut flour

Picture
Mix all your wet ingredients and  mash your banana in, too.

Picture
Then add your dry ingredients and whisk well to break up any lumps of flour.

Picture
Heat your skillet and add coconut oil or butter. Coconut oil has a higher smoking point, so try to use it over butter. If you don't like the taste it gives, you can buy it expeller pressed and it will have a neutral taste.

Picture
Place about a 1/4 cup of batter for each pancake. Don't make them too big. They are soft when flipping and will break if made too large.

Flip when you see the sides bubble and the under side is browned.

Picture
Top with grass fed butter and strawberry jam.

0 Comments

Vegan Eggnog

12/19/2013

0 Comments

 
Picture
Smooth and creamy with no heavy after glow. This nut milk nog is a hit in my house!

1 cup Coconut Cream or other nut milk of choice (store bought Almond milk will do in a pinch or you can make it from scratch -it doesn't take much effort)
1 ripe Banana
1/2-1 tsp. Cinnamon
1/4-1/2 tsp. Nutmeg
1/8 tsp. Vanilla Bean seeds or 1/4 tsp. Vanilla
1/3 cup Toasted nuts (Almond, Macadamia, Coconut... have fun each time choosing!)

Blend all smooth in a blender and top with cinnamon or nutmeg as a garnish.


0 Comments

Quality Fudge

12/14/2013

0 Comments

 
Picture
Well, it's the Holiday Season. No matter what holiday you do or don't celebrate, most people have parties to attend and want to bring something to offer. This fudge recipe is simple and it's sure to be a hit at your gathering. It melts in your mouth and doesn't give you a crazy sugar high. Just good fats. And if you're in ketosis like me, that's mostly what you're after.


1/3 cup Coconut Oil (I prefer the neutral taste of this one)
1/3 cup Grass Fed Butter
3/4 cup Nut or Seed butter of choice (I happen to have used my favorite peanut butter)
Pinch of Sea Salt
1/2 cup Cocoa Powder (I really prefer dutch process over raw cocoa for this recipe)
1 Tbs. Liquid Sweetener of Choice (Date syrup, Maple syrup, Honey, Coconut syrup...)
4-5 Drops of Stevia

Optional:
1 tsp. Mint Extract
1/2-1 cup of raw Nuts or Seeds
Sprinkle shredded Coconut on top

Double boiler or bowl over a pot

Picture
Melt your butter and coconut oil over steaming water in a bowl. I just brought the water to a boil and then shut it off to ensure a slow gentile process.

Picture
Then add your nut butter and let it melt in till creamy and smooth.

Picture
Add your vanilla, salt, cocoa powder and stir till smooth.

Picture


At this point you are done for basic fudge, but there are some wonderful options here.

For creamy mint fudge (my favorite):
add 1 tsp. of mint flavor

Picture


Or you could leave the mint out (or in) and add some nuts or seeds. I've chosen hazelnuts here. This adds a lovely crunch to the final product.

Picture
Then pour into a parchment lined pan. the size will vary depending on if you like the chunks thick or thin bars. What ever you like.

The parchment paper is for easy removal. You could do as I have in the photo, or just line the bottom.

Sprinkle coconut shreds on top for some snowy fun!
Let it set up in the fridge (or freezer for chocoholics) for about 2 hours.

Picture
Creamy

Picture
Crunchy

0 Comments

Heavenly Eggs

12/14/2013

0 Comments

 
Picture
Some call them Deviled, but they seem straight from heaven if you ask me! Creamy and full of protein. They are so perfect for a gathering, but I sometime invite others over just so I can have a reason to whip them up. I hope the mailman doesn't get the wrong idea...


10 Pasture Raised Eggs
4-6 tbs. Home made Mayo
1/4 tsp. Onion Powder
1 tsp. Dijon Mustard
3-4 pinches Herbamare or Sea salt
White Pepper to taste

1 tsp. Vinegar of choice (I used wine vinegar this time)
1-2 pinches of Cayenne Pepper
Paprika and Chives for garnish

Pastry bag and fancy tip or ziplock


Picture
These are my favorite store bought pasture eggs. Of course the best eggs I've ever had were from a home in the country where the chickens were free running and had access to worm beds. Deep orange color and flavor out of this world!

If you can, grow your own, or find someone local who does. Night and day difference in experience! Which means probably in your health, too. City folk, you can find the ones in the photo at Whole Foods and some other health food stores.

Picture
Place the eggs in cold water and bring to a boil for 2 min.
Then take off the heat and let them sit covered for 20 min. this will yield very yellow yolks with no dark coloring.

Picture
pour all the hot water out and let cold water run over the eggs for 3-5 min. This helps the shells to separate from the egg.

Picture
Peel your eggs by tapping them to crack the shells. Then under water, separate the shell from the egg.

Be sure to get the thin skin just under the shell to come off. if you try to take the shell without this thin layer, you run the risk of more damaged flesh in the egg.

Picture
Cut your eggs length wise in half and remove the yolks.

Boy! Look at that color!

Picture
Mix all the seasonings together with a fork until smooth. I HIGHLY suggest using home made mayo! Regular mayo is filled with poor quality oils and who wants to feel bad? NOT ME! I haven't yet found a store bought one that has my standard of ingredients.
It only takes about 8 min to make mayo. Invest in yourself!

Picture
Place your mixture into a pastry bag with a fancy tip or if you're in a pinch, just use a Ziplock baggie as I have shown here.

Picture
Cut a small hole by taking off one of the corners of the baggie. Make it big enough to get a fair amount of egg out.

Picture
Squeeze out the yolk mixture into each egg white boat.


Picture
Garnish with Chives only.
Or Chives and Paprika.

Mmmmmmmm!

Picture
A travel tray can be very helpful. Even if you're not taking your eggs anywhere but to your fridge.

This one can carry: pies, cakes, cupcakes, eggs and veggies with dip. Fun and useful.

0 Comments

Chestnuts on a Open Fire

12/13/2013

0 Comments

 
Picture
When I think of winter as a kid, I remember my grandpa's house smelly nutty sweet with chestnuts in a cast iron skillet on his stove. My mom took over this tradition on our wood stove. As the song goes it's an open fire, but how many city people have access to fire roasting? Most don't unfortunately, at least not a traditional fire with logs, but what about the BBQ?  These are soooo easy to make and sure are tasty!  Chestnut Greetings.


Chestnuts in shell

Serrated knife
BBQ basket is helpful
BBQ,  fireplace or gas oven if nothing else.

Picture
Watch out for nuts with mold. Discard.

Picture
Make a horizontal cut in the side using a serrated knife. Make sure you penetrate the hard skin but don't go too far into the nut.

Picture
Peak-a-boo!

Picture
You can also cut them into a traditional X, but it actually opens easier in the end with the long horizontal cut described above.

Picture
Cover them with water and bring to a boil. Simmer 3 minutes and then drain.

Picture
Place in a BBQ basket if you have one. This just makes it easier to maneuver and toss while on the BBQ.

Picture
BBQ at 300 degrees for 10-20 min tossing occasionally so they don't burn until the skins open and the nuts are aromatic.

Picture
Baci nonno. Mi manca la tua cucina calda e grandi abbracci! ~Mici

In remembrance of those you love and miss this holiday season. May the memories you spent together warm your heart.

0 Comments

Dark Chocolate Banana Muffins

12/2/2013

0 Comments

 
Picture
Muffins are like little cakes. These delightfully chocolate ones are naturally sweet and make a light breakfast or snack feel like a mini party.


​
​
2 Ripe Bananas
1 cup almond butter (or other nut/seed butter)

2 tbs. Date Syrup or honey (Click here for more info)
1 tsp. Vanilla
4 Pasture Raised Eggs
1/3 cup Butter, melted
1/4 cup Apple Sauce
4 drops Stevia
1/3 cup Coconut Flour
1 tsp. Baking Powder
1/2 tsp. Cinnamon
1/4 tsp. Sea Salt
3 tbs. Cocoa Powder, Dutch process

Picture
Mix everything together.
(See note below)

Picture


You need nut butter with this consistency...

Picture


​
...Not dry like this.
(If you still have the oil that rises to the top of the jar, you can blend them to acheive the desired smooth texture like in the picture to the left.)

Picture
Spray or line your tins. This makes 9-10 muffins.
(I'm using spray coconut oil)

Picture
Fill them only 1/2-3/4 high. They will grow quite a bit while cooking.

Bake 15-20 min. on Convection. Flip them around and continue on regular Bake for another 15 min.


Picture
Wonderful plain or with Ganache:

3/4 cup Cocoa Powder
1/2 cup Date Syrup or Maple
4 drops Stevia
1/3 cup Coconut oil or Butter, melted
1 tsp. Vanilla
pinch of Sea Salt & Cinnamon

Blend smooth.
Store in squeeze bottle at room temp.


0 Comments

Cream of Symphony Soup

11/25/2013

0 Comments

 
Picture
I have been genuinely surprised that everyone has verbally, without provocation, told me how much they love this soup. Creamy and full of flavor. Add bacon or leave just veggies. It has so many vegetables in one serving, its a great way to get the less-used veggies into your diet.

Perfect light meal-in-a-bowl after all the holiday over eating.


1 Onion
1-2 cloves of Fresh Garlic
1 small Zucchini

1 bunch of Asparagus
1 head of Broccoli
1/2 head of Cauliflower
1 small Celery Root
1-3 tbs. Grass Fed Butter

Chicken stock or Water
5 oz. Container of Arugula
Sea Salt to taste

Picture
Peel the celery root and clean and chop up all your veggies. It doesn't matter the size as this soup will be being blended. Yippee! Easy.

Picture
Use your broccoli stems! Under that tough skin is tender broccoli flesh.

This is an other idea for your broccoli stems (Pressed Salad)

Picture
Make your chicken stock or skip this step if you're using just water. (Click here for instruction)

Picture
Saute your onions in a generous pad of butter.

Picture
Then add all your veggies, minus the arugula, and the broth to the pot. Bring to a boil and simmer until everything is tender. About 15-20min.

Picture
OPTIONAL: Add 2-4 strips of bacon or turkey bacon for an added umph!

Picture
Once everything is soft, add the arugula and simmer 3-5 min.

Picture
Blend with an immersion blender or in batches in your regular blender. Season with salt to taste.

Picture
Symphony Soup.

Delish.

0 Comments

Persian Stew

11/24/2013

0 Comments

 
Picture
It's cold and windy in North England. "What would you like to do today?" my friend asks me in French. "I can think of nothing better than learning from your mom how to make a traditional Persian dish." I then spend the best day in the warm kitchen with smells and taste combinations I've never had before, laughing and cooking. It was one of the most memorable and fun times on that trip to Europe.

Her mother didn't speak English and I don't speak Farsi, so your guess is as good as mine as to the name of this stew. It's made with walnuts and pomegranates. In Persia, its only prepared at important events like weddings, etc. I'm so happy to share this exotic treasure with you for the Holidays!

3 cups Walnuts
1 med Onion
2 cloves Garlic
2-3 Lbs. Organic Free Range Chicken  or Stew beef (I'm using boneless beef ribs here)
1 tsp. Turmeric
1 1/2 cups Water plus 1 more cup
2 tbs. Tomato Paste or 1/3 cup Tomato Sauce
1/2-3/4 cup Pomegranate Molasses (see below)
1/2 tsp. Sea Salt
1/2 cup Date syrup (click here to learn more) or coconut sugar to taste

Picture
Roast your walnuts for 10-15 min. They need to be aromatic and golden not browned.

Picture
Roughly chop your onion and skin your garlic.

Picture
Add onion, garlic and turmeric to walnuts with 1 1/2 cups water into a food processor. My Blender is a Ninja, so it can food process. A regular blender may not blend everything smoothly.

Blend until smooth. 

Picture
Pour into your cooking pot. Then add the 1 cup of water to the food processor to get all the walnut particles off the blades and sides. Add to the rest of the mixture in the pot.

Picture
It should have this consistency.

Picture
Bring to a boil. Boil on low for 30min or so.

Picture
You can find Pomegranate molasses at your local Iranian store. Most cities have one. If not, maybe the internet. It's only a few buck. Be sure to get the one that has no added sugar. Just pom concentrate.

Add pom molasses and tomato paste.

Picture
Low boil until the oils separate like in this picture.

Picture
Add your meat and cook for 2-3 hours (depending on your cut). Just make sure whatever meat you choose is falling off the bone or very tender.

At that point, add your date syrup. Mix well.

Picture
This dish is traditionally served with Persian rice with the crispy bottom...

Picture
... but because of it's sweetness, I suggest something plain or salty like my Fish tail potatoes for a grain-free option.

Picture
When you have leftover sauce and have eaten all the meat, saute some sausage up and pour over zucchini pasta. This was even better than the original... but left overs usually are, aren't they?

0 Comments

Stewing Meat

11/23/2013

0 Comments

 
Picture
Not eating meat for most of my adult life, I had no idea how to make it tender and flavorful. When I  made the switch, I asked my body how it would like my first piece of meat and I saw a picture of a woman stirring a caldron over a fire. It had carrots, cabbage and potatoes in it. You would expect the body to have some difficulty with it's first time in almost 20 years, but there was none! I was emotionally ready and I chose my first cooking technique well. Now I'm known in my circle of friends as "super carnivore" as a joke. And needless to say, I've mastered stewing it. Many of my clients also like it this way, I hope you do, too.

1-2lbs. Grass Fed Stew Meat (like Chuck, Shank or Rump Roast)
Pad of Grass Fed Butter
Fresh Garlic
Stew Spices: Bay Leaf, Pepper Corns, Mustard Seeds, Rosemary, Red Pepper, Coriander Seeds, Onion Powder
Sea Salt
Water
Optional: Cooking Wine


Picture
Melt your butter in a stew pot. I have a Zepter one that really cooks nicely, but anyone with a thick bottom and stainless would be fine.

Picture
Add your stew meat and fry in butter until it is brown and aromatic. Boy will it be aromatic! My mouth waters at this stage, but you have to snack on something else, because it's gonna be hours before it's done.

Picture
Turn it over and braise the other side.

Picture
Once both sides are browned, add fresh garlic and your cooking wine if you are using it. Maybe 1/4-1/2 cup.

Picture
Place your spices of choice on a piece of cheese cloth. I'm using 1 tbs. of corned beef mix here plus adding rosemary. Each time I do it a little differently. Play around to find your favorite combo.

Tie the cheesecloth in a knot, trapping the spices, so they give flavor but you can remove them later.


Picture
Add enough water to come at least half way up the side of your meat and bring to a boil. Then cover and let it simmer on low flame for 3-4 hours. This will depend on your cut of meat. Half way through, I usually flip it.

It's done when it falls apart with the touch of a spoon.

Picture
Remove the spice sack.

Picture
If using shank, take the bone out. Any marrow that may be left inside, remove and leave it in the broth.

Picture
Taste and season with salt if it needs it.


Options: Wonderful just as it is...

Picture
...Or add vegetables and a little tomato sauce for a beef vegetable stew.

Picture
...Or drain the liquid for another soup and add BBQ sauce.

I don't generally eat agave. It doesn't seem to break down in the body as clean as other sugars (something about an extra carbon on it's molecule), but once in a while, just for fun, I'll use this brand.

In the future, I'll create my own BBQ recipe and post it here.

0 Comments
<<Previous
Forward>>
    Picture

    Author

    Mici is the owner of Wholesome Goodness.

    These recipes are focused on wholesome ingredients from the garden or farm with very little sweet if any. They are gluten or grain free and organic, grass-fed or pasture raised.

    She menu plans, shops, cooks, cleans and fills the fridge with healthy Gluten-Free meals and naturally sweet desserts!

    She also teaches and does personal menu planning for those with restricted diets.

    To sign up for blog email  updates click:

    Email Updates

    Categories

    All
    A Beef
    A Chicken
    Baking
    Breakfast
    Dehydrator Fun
    Holidays
    How To...
    Juices & Smoothies
    Kitchen Tricks
    Light Breakfast
    Macrobiotic Techniques
    Non-Bovine Dairy
    Paleo
    Paleo Quality
    Party Dishes
    Raw
    Sauces & Dressings
    Simply *Sweet*
    ~Snacks~
    Soups & Stews
    Veggies!

    Questions?

Submit
"I have been richly blessed by Mici’s healing presence in my life.  As a facilitator of personal transformation, her passion and dedication to serving others is evident.  I have grown tremendously from her gifted use of emotional healing work, nutritional counseling, culinary artistry and organizational skills.  She unfailingly demonstrates the highest efficiency and effectiveness, true strength of character, wisdom reaching well beyond her years and a generous heart of gold."    

~Gabriella B.


Proudly powered by Weebly