Organic Whole Foods Made with Integrity
Wholesome Chef Mici
  • Home
  • About Mici
  • Services
  • Recipe Blog
  • Photos
    • Paleo Pix
    • Macro/Desserts Pix
  • Videos
  • Gluten?
  • Paleo?
  • Like Minded
  • Testimonials
  • Contact

Caramelized Onion Pate

10/17/2013

0 Comments

 
Picture
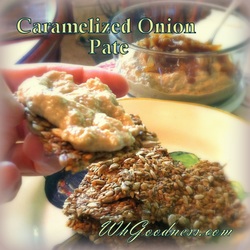
Dips are such a great way to enjoy your veggies! This is one of my favorites, and it's so easy to do. You can make it raw or roasted. Dip veggies, or spread on your favorite crackers. Either way, its a crowd pleaser.

The difference between these 2 recipes is time and time! Raw will take a lot more time, but if you prefer your dip to not be cooked, then the description is to the right!

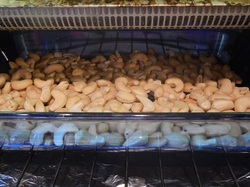
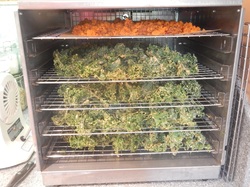
Roasted:
2 cups Raw Cashews, we will roast
2 large Onions
1/4 pinch salt
3 Tbs. Olive Oil
3 Tbs. Balsamic vinegar(I really like to use flavored ones. Fig is my preferred)
3 Tbs. Sweetener like coconut nectar or date syrup
1 Tbs. Sea Salt
1/4 cup water

Picture


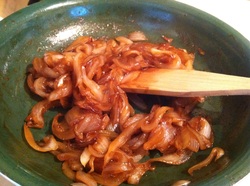
1. Place all the ingredients except water into a saute pan and saute on med low flame until the onions are golden and gooey. Add water during the browning just to make sure they don't burn.

Picture


While your sauteing, place your cashews on a sheet pan and Bake at 350 degrees for 10-15min or until golden and aromatic.

Raw:
1 1/4 cup Raw Cashews, Soak for 2-8 hours
2 large Onions
1/4 pinch salt
3 Tbs. Olive Oil
3 Tbs. Balsamic vinegar
3 Tbs. Sweetener like coconut nectar or date syrup
1 Tbs. Sea Salt
1/4 cup water


Picture


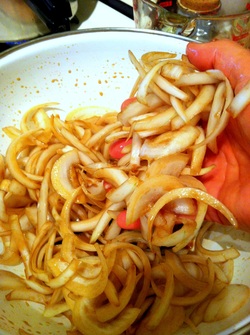
1.Thinly slice your onions into half moons and toss in a bowl with the rest of the ingredients. Let sit for 1-2hours to marinate.

Then drain and place in dehydrator at 115 for 5-6 hours. Save the marinade for the blender.


Now, follow the same directions for either roasted or raw.
Picture
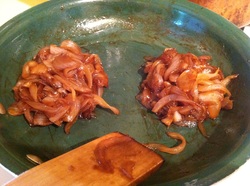
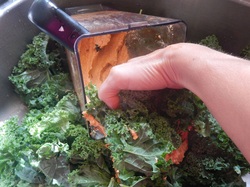
Separate your onions in half.

one half will go in the blender and the other will either be garnish or mixed in to the final product.

(Don't be alarmed if you have more onions than in this picture. I made a small batch this day)


Picture
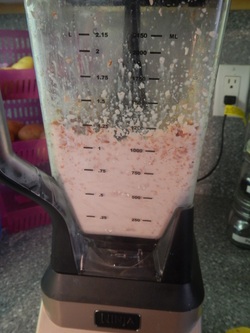
Blend your cashews with all the ingredients (except half of the onions for garnish.

You want a thick pate, not a pourable texture, so add a little water if needed. This is best accomplished with a food processor or the type of blender that I have called the Nija. It has 6 blades as opposed to just on the bottom like traditional blenders, so it acts like a food processor.

Picture
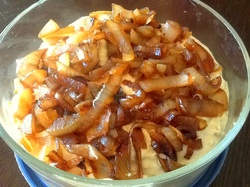
Pour into your serving or storage bowl and either top with the remaining onions or stir them in.

YUMMMMMMMmmmmmmm!

One of my cracker recipes to come soon...

0 Comments

Kale Chips Red Pepper

10/12/2013

1 Comment


Picture
4 bunches Organic Curly Kale
1 Organic Red Bell Pepper
2 cups Organic Cashews, raw 
(or 1 cup sunflower seed butter if nut-free)
1 tsp. Onion Powder
1 tsp. Garlic Powder
2 tsp. Paprika
2/3 cup Lemon or Lime Juice
2 tsp. Lemon or Lime Zest

1/2-1 tsp. Sea Salt
Mmmmmmmmm Chips!

Who cares if they are green... They're yummmmmmy and hit the spot when you need crunch! They are so packed full of nutrition, too!
For some of my clients, they are a weekly must have!

Cut this recipe in 1/2 if you have a small dehydrator.


Picture
Roast your cashews in a 300 degree oven until golden brown and aromatic. If you prefer your kale chips to be raw, then soak your cashews overnight instead.

Picture
Clean and sanitize your sink. Be sure to also get the stopper for the drain. Fill with water and dunk your kale to clean off all dirt and bugs. You can add some vinegar if you like. I de-stem at this point, too. Drain the water and fluff the kale to get as much excess water off as possible.

Blend all your ingredients well. I like to make this a thick pate as the kale will be holding quite a bit of water from washing. Use the Kale to clean out the blender so you get every little bit! Knead the mixture into the kale to cover it all evenly.

Picture
Place evenly on dehydrator trays.

Dehydrate at 135 degrees for 5-8 hours.

Or if you prefer your Kale raw:
Dehydrate at 130 for  45 min and then down to 105 until done. This could take up to a day or two to get crispy.

Picture
You will know they are done when they are crunchy like potato chips and have no more wet leaves. They will darken in color.

Picture
Dig in! This made 4 big bags!

But that doesn't mean they last very long!

One of my favorite snacks of all time...

Kale chips... Come and get 'em!

1 Comment
    Picture

    Author

    Mici is the owner of Wholesome Goodness.

    These recipes are focused on wholesome ingredients from the garden or farm with very little sweet if any. They are gluten or grain free and organic, grass-fed or pasture raised.

    She menu plans, shops, cooks, cleans and fills the fridge with healthy Gluten-Free meals and naturally sweet desserts!

    She also teaches and does personal menu planning for those with restricted diets.

    To sign up for blog email  updates click:

    Email Updates

    Categories

    All
    A Beef
    A Chicken
    Baking
    Breakfast
    Dehydrator Fun
    Holidays
    How To...
    Juices & Smoothies
    Kitchen Tricks
    Light Breakfast
    Macrobiotic Techniques
    Non-Bovine Dairy
    Paleo
    Paleo Quality
    Party Dishes
    Raw
    Sauces & Dressings
    Simply *Sweet*
    ~Snacks~
    Soups & Stews
    Veggies!

    Questions?

Submit
"I have been richly blessed by Mici’s healing presence in my life.  As a facilitator of personal transformation, her passion and dedication to serving others is evident.  I have grown tremendously from her gifted use of emotional healing work, nutritional counseling, culinary artistry and organizational skills.  She unfailingly demonstrates the highest efficiency and effectiveness, true strength of character, wisdom reaching well beyond her years and a generous heart of gold."    

~Gabriella B.


Proudly powered by Weebly